Why do we know what the best bitrate for Twitch stream are? Well, before we were making Twitch Overlays we were streamers ourselves, so we know too well the struggles of streaming and broadcast quality issues. We like to use the Twitch Inspector to help us figure out what bitrate you should use. You can use it to analyze your streaming bitrate and troubleshoot internet connection or encoder related issues. This makes it much easier to find the perfect stream settings for you and your audience.
What is the Best Bitrate for Twitch?
Generally you should use 3000kbps with a reolution of 1280×720. However, you also need to consider the hardware you’re using, type of content you’re creating, and the even options for your viewers.
There’s also the issue of what bitrate should you use versus what bitrate works best for your stream. For instance, if you’re playing FPS games with a great computer, but subpar internet connection, you’re going to have some issues with the clarity of your movements while gaming. We wrote more on overlay layouts and streaming recommendations for Valorant streamers in another blog post that you might find helpful as well.
So with realistic expectations in mind, let’s choose the best bitrate for your stream. To figure this out we’re going to use OBS Studio and the Twitch Inspector tool. If we break things down into three simple questions, then this question gets a lot easier. These questions are:
- What are the limitations of my hardware?
- What is the limitation of my internet connection?
- What’s best for my audience?
What bitrate settings should I use to stream with my computer?
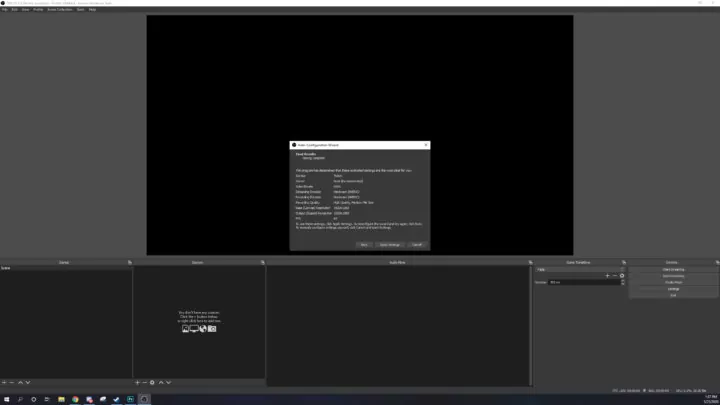
To find out your hardware limitations let’s load up OBS Studio. We want to run the Auto-Configuration wizard first, in order to get a general idea of what your system specs (and internet connection) can handle. Keep in mind this, this is only a good guess, so we will need to do some tweaking down the line.
How to use the OBS Studio Auto-Configuration Wizard
- Select Tools > Auto-Configuration Wizard
- Select the option best suited for your needs, in this case, let’s use Optimize for Streaming, recording is secondary
- Select your desired base canvas resolution and FPS
- Enter your stream information, let’s use Twitch so that we can take advantage of the Twitch Inspector tool. You can connect your account or get your stream key from: https://dashboard.twitch.tv/u/yourname/settings/stream
- Let the bandwidth test run
- Click Apply Settings
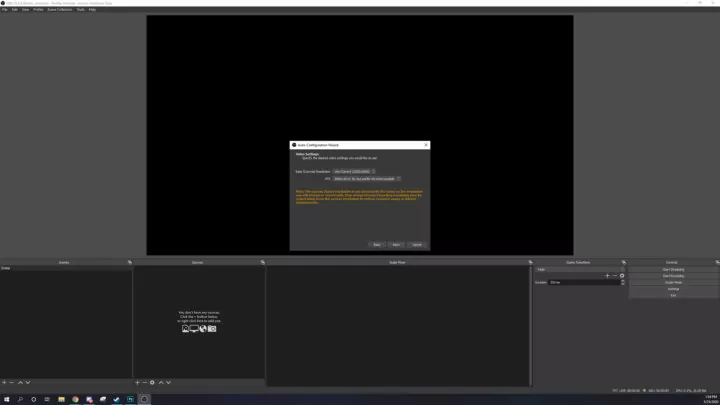
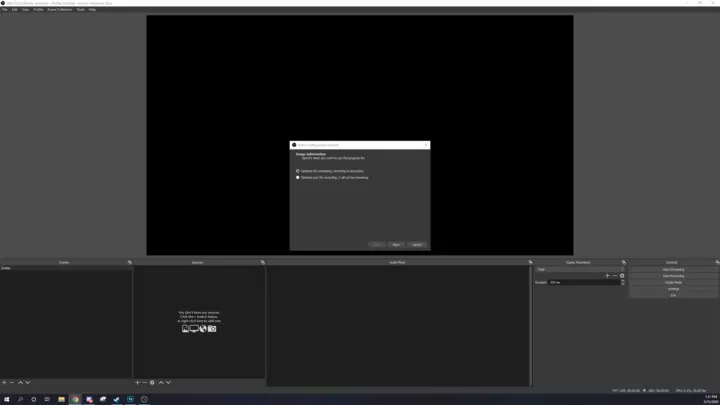
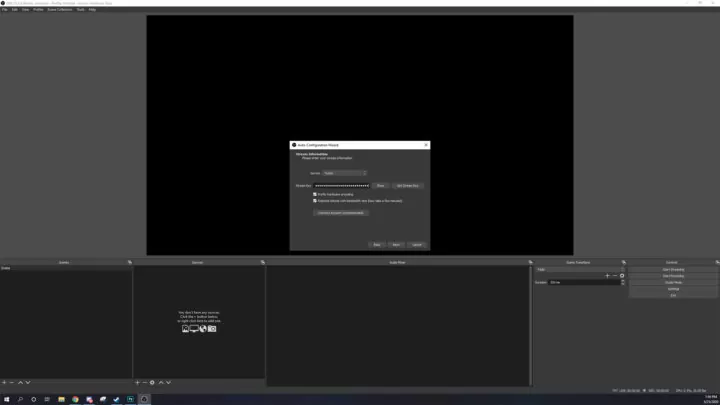
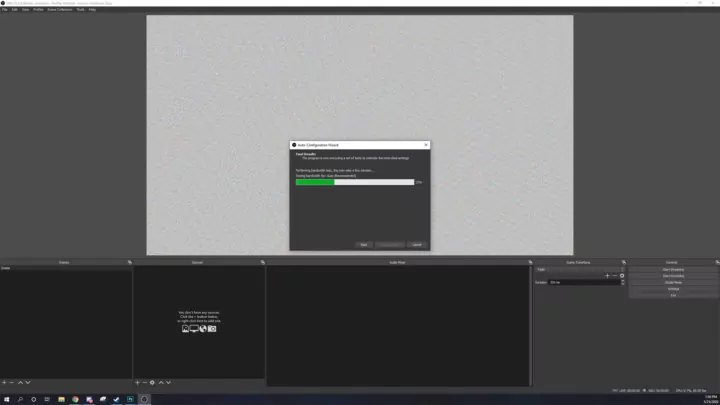
Now that the tool has estimated your best bitrate for Twitch, you should have a good idea of where to stream at. In many cases, this might be enough to get you started and going on Twitch.
But, if you’re experiencing dropped frames or a laggy stream still, what can we do about it? Well, that’s where we need to dig deeper and diagnose what exactly is causing your problems.
Using the Twitch Inspector
We want to use a tool like the Twitch Inspector to help us further understand what exactly is happening with our connection. While the Auto-Configuration tool is extremely helpful to get started, there are still a few problems that can pop up in finding the best bitrate for Twitch.
If your ISP was having a good day, then your average speed might be lower than what’s required for your current settings. Additionally, if you weren’t running a demanding game or stream setup, then you still might get dropped frames here and there, as the wizard makes a guess on your best settings. This tool will eliminate that guess work so we know what needs to change, if anything.
This tool will take the guess work out of issues with your stream bitrate. We’ve used it many times to figure out if we’re having a problem with our hardware or internet connection
Head over to the Twitch Inspector page and click the login button. Authorize your main channels account to proceed to the next screen. When you first log in you won’t see very much if you’re a new streamer. If you’ve streamed before you may see some of your past broadcasts in the main area.
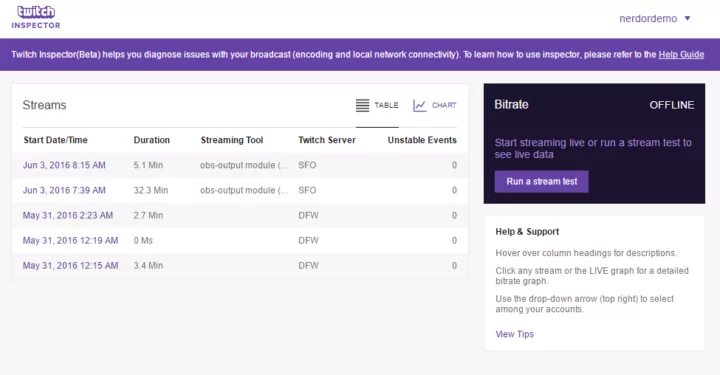
Let’s start from square one and take a quick look at the interface. In the top right we can add additional accounts that we’d like to test if needed. Below we can see a button to run a stream test. There’s also a view tips button that is extremely helpful in answering common questions about bitrate and encoding troubleshooting. The main area will eventually show us the breakdown of our tests.
Let’s go ahead and click run a stream test. The popup here basically tells us to do the following:
- Get our stream key from the Twitch Dashboard
- Open your encoding program (OBS Studio, Streamlabs Desktop, XSplit, etc.) and add ?bandwidthtest=true to the end of your stream key. It will look something like live_0000000_xxxxxxxxxxxx?bandwidthtest=true
- Start streaming
So, let’s go ahead and grab our stream key from the Twitch dashboard and then open up OBS Studio. In settings then stream paste your stream key into the stream key area. Click show so that you can see exactly what you’re typing. At the end of the key simply add ?bandwidthtest=true .
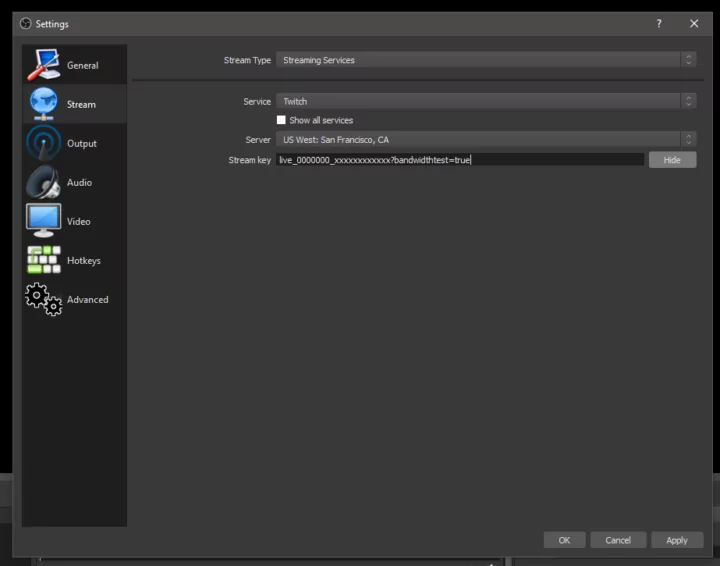
In the output tab make sure that your video bitrate is at 6,000 kbps, which is the highest that Twitch specifies to use. I’ll talk about server selection at the end of this post, but for now just select the one that is closest to your location.
Update: When this article was originally written, 3,500 kpbs was the maximum bitrate
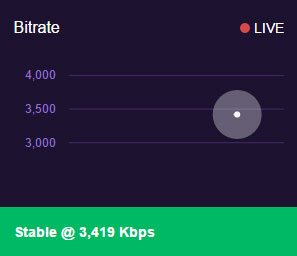
After this is complete, hit start streaming and then go back into the inspector tool. After a short while we’ll see a couple of things change on this page. Once your connection has been established we’ll see the dark box in the top right corner turn into a live chart that displays average bitrate. You’ll also see information about what your connection is currently stable at.
I recommend leaving this test running for at least 5 to 10 minutes if you can. The longer, the better. The problem with some online speed tests is that they’ll only measure a short amount of time. With this tool, be can take an in-depth look at what’s happening with our bitrate.
What’s the best bitrate for my Twitch stream?
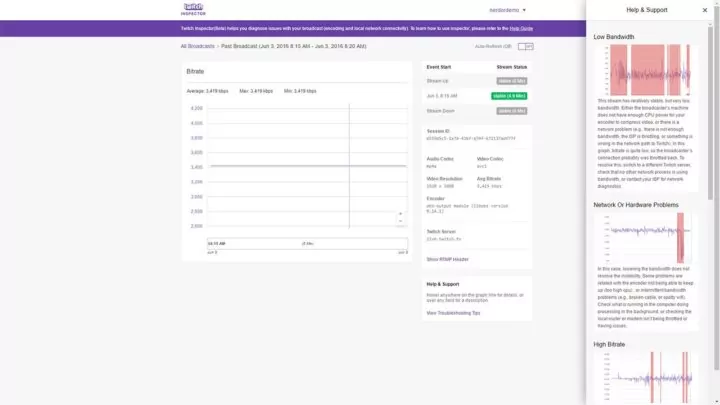
So what should you set your bit rate at? You want to set it to the average bit rate from your test. You can monitor your current connection on the main page, but let’s get some more detail in the test by clicking one of our current or past test streams in the main area.
We’ll be presented with a full chart of our bit rate that shows the average, max, and minimum bit rate. So in my case, I’ll be safe to set mine around 3,400 kbps. This means I can safely stream at 1920 x 1080 resolution.
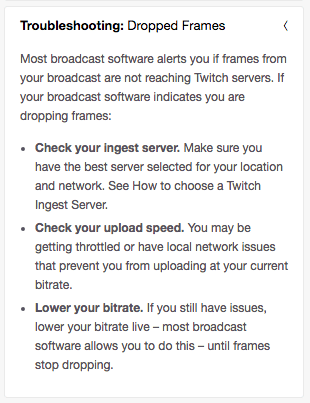
Back on the inspector page we’ll see more information in the sidebar, as well as a view troubleshooting tips area at the bottom. If you click this it will show you different types of graphs and what they mean. If you don’t have a stable graph, then you’ll want to compare these graphs to your own, in order to better troubleshoot your problems.
To go back to the main page we can click all broadcasts towards the top.
While the tips are still open I want to mention that if you’re a new streamer you should consider taking the time to read through these different sections. As I mentioned before this area will contain information to help you quickly identify different problems, and it will answer a lot of common questions around finding the best bitrate for Twitch.
They even has sections about troubleshooting dropped frames and delay. The common factors here would be an issue with your upload speed, a need to lower your bit rate, or changing your ingest server.
Earlier in the post I mentioned picking the server closest to you. While this is generally the best thing to do -it’s not always accurate. As explained in the tips there can be issues with how your ISP routes your traffic. This means that sometimes the geographically closest server isn’t the best. For this reason, I still recommend using the Twitch bandwidth test tool. I made a video about using this tool, which I highly recommend watching.
For any streamer, I’d recommend using the test tool to determine the best servers for your stream. Then, I think it’d be a good idea to use the Twitch inspector to get a better understanding of what’s happening with your bit rate. This will help you figure out what’s really causing your dropped frames an ensure you’re getting the best birate for Twitch.
Hopefully in the future Twitch makes a first party tool that helps you select a server in an easier way. For now, I still think the inspector is pretty awesome, and very powerful. If you have any questions about how to get the best bitrate for Twitch, make sure to leave them in the comments below or join our Discord!
New Posts
Streamers VS Mainstream Media
April 8, 2024
The digital landscape is ever-evolving, and with it, the rise of streaming in…
0 Comments7 Minutes
Premium and Free Twitch Overlays Templates
March 24, 2024
Twitch overlay templates are what we do best. Here is a selection of freebies…
0 Comments7 Minutes
Free Twitch Overlays, Alerts, and Widgets
March 3, 2024
Free twitch overlays, alerts, and stream widgets are something that we’ve been…
0 Comments9 Minutes
