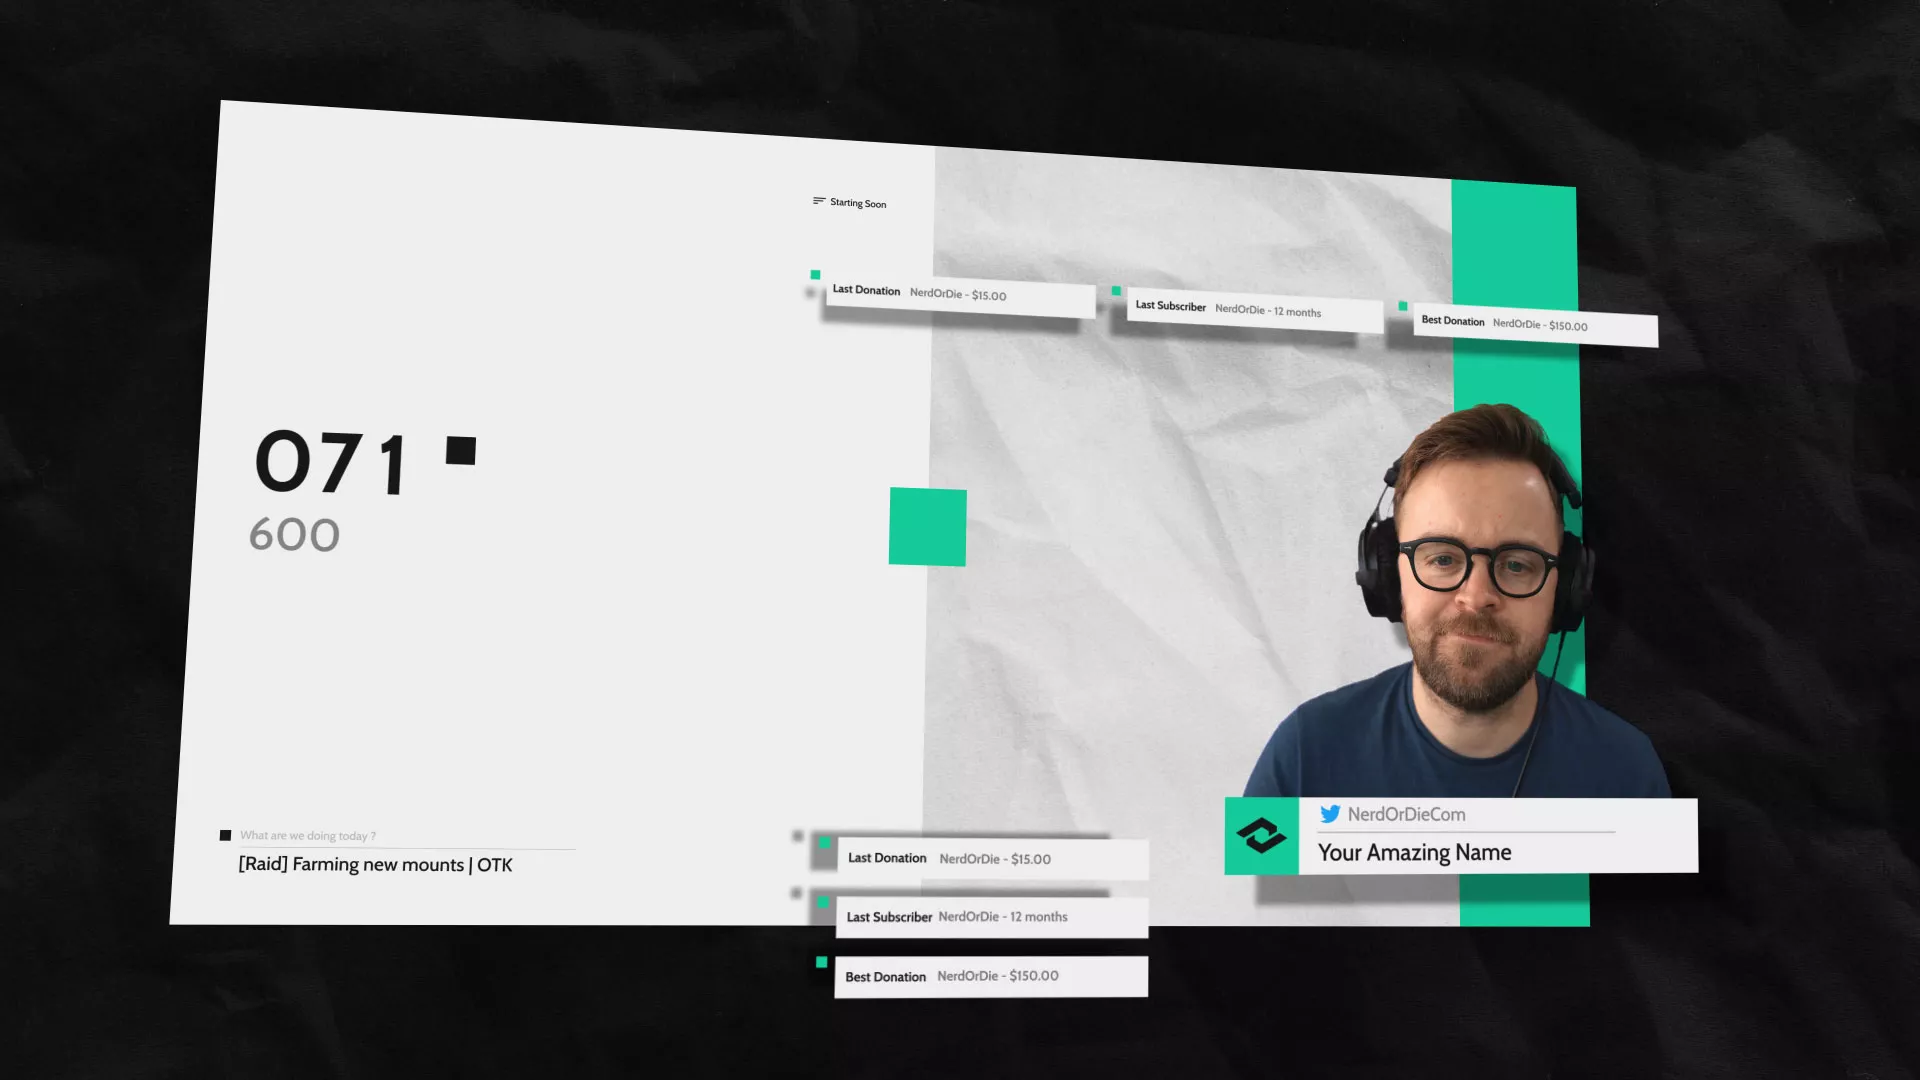
So, you’ve just downloaded the latest overlay pack from Nerd or Die, and you want to change the color of the overlay to suit your brand colors. But how do you do this? Luckily enough, this Color Filter tutorial will make this easier for you. The following six-step method is the most straight-forward way to immediately change your overlay colors in OBS Studio.
Before we start, we’re assuming you’ve got two things:
Step 1
Load up OBS and ensure you have the latest version.
Tip: Always run OBS in administrator mode-it runs more efficiently-on Windows. As stated by dodgepong on the obsproject forums, OBS version 24.0.3 (and beyond) includes a fix on Windows that helps alleviate the framerate rendering issues that some instances of OBS are having. To test this, run a game with high GPU needs, such as Apex Legends. Run OBS in administrator mode, then Open the ‘Stats’ window under. View > Stats, or View > Docks > Stats. Check to see if your FPS matches in-game FPS.
Step 2
Create a new Scene Collection. This is for testing purposes in this tutorial only, and makes it easier in the long run.
Step 3
Add a new Source, and locate the cam overlay media from your Nerd Or Die Overlay Pack. If it is animated, it will need to be added as a ‘Media Source’. If it is just a static image, then add the source as an ‘Image’.
The easiest way, however, is if you have a overlay pack from our collection. You can use one of the ‘Quick Install’ Option! Just go to Tools > Scripts > Hit the ‘+’ Icon > Go to where you’ve put Overlay Folder > Open OBS Studio Quick Install Folder > Open the ‘.lua’ file.
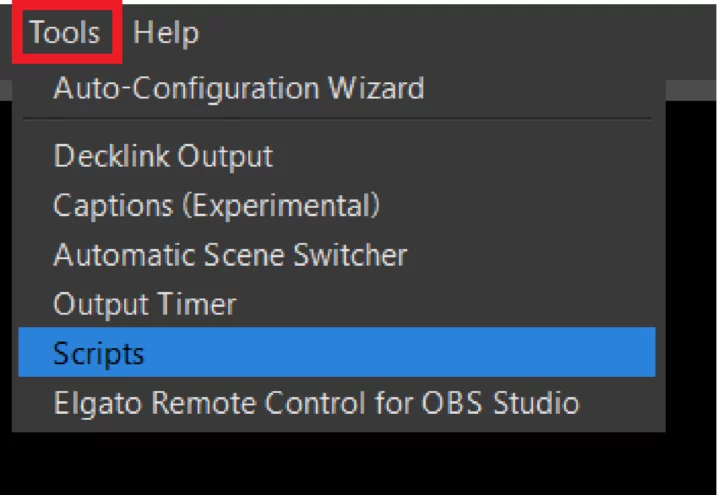
From here, you can install all scenes, or whatever scene you want. There are helpful text files in the pack folders as well.
Step 4
In this example, there is a cam frame, so we named it “Cam Overlay”, name this however you see fit.
Now, right-click the Cam Overlay and click “Filters”.
Step 5
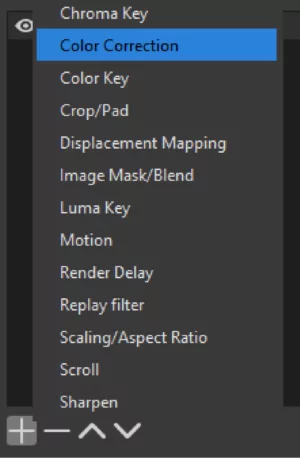
Click the “+” button under the “Effect Filters” window and select “Color Correction”.
In this diagram, we have other options there, ignore those, you only want “Color Correction”.
Step 6
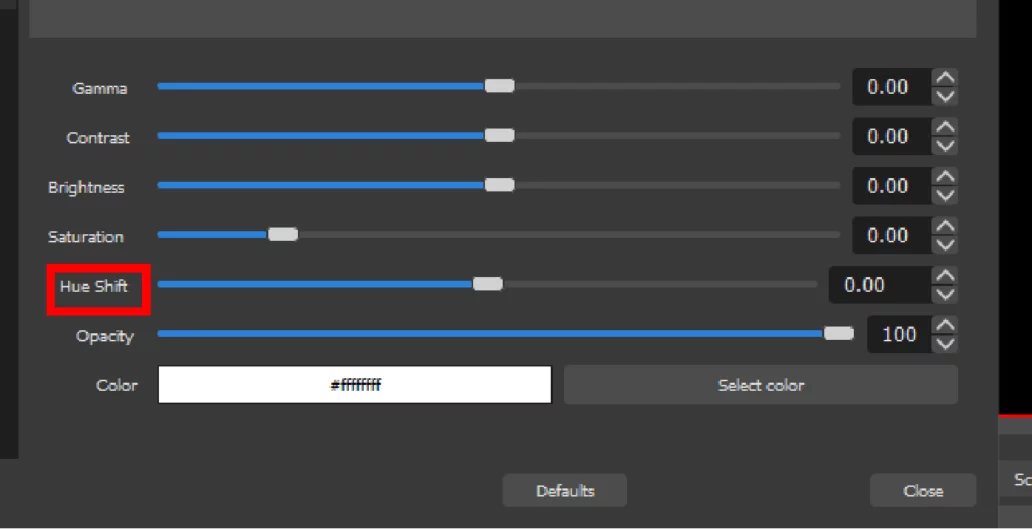
The hue shift method. If your source element has multiple colors, and you want to shift all the colors of the element, then we recommend using hue shift. Slide to change the colors with the ‘Hue Shift’ Slider. Using this slider will change the color and shade of the base overlay element, it’s easy find the exact fit for your stream and brand colors.
Remember, in the Nerd Or Die packs, there are different colored base versions of whatever element you want to change. Therefore, it will start with a different color, and you may find that using another version will help you find the right color.
Tip: For easy future reference, take note of the numbers to the right of the slider and put them in a safe text file for later reference. You never know when you’ll need it! Believe me, you’ll kick yourself if you don’t!
The color picker method. If you source element is a solid color, and you’d like to change it to an exact solid color, then we recommend using the color picker.
Click the ‘Select color’ option.
Here you’ll be able to enter in an exact hex code in the HTML box, choose from the pick color screen, or even use the RGB values.
While this is more exact that shifting the hue, saturation, and/or brightness, the downside will be that it will overlay the selected color on the entire source. We generally only recommend this option for sources that will be one solid color.
Tip: Sometimes (rarely) when using this method you won’t get the exact hex code you’re entering. We’ve found it’s best to start with sources that are white. However, if your source element is not white, you can first add a color correction filter where you drop the saturation to -1.00 and boost the brightness up to 1.00, which will cause your source to turn white. From here, you can add a second filter on top, and enter in the exact color value you’d like.
That’s it, you’re done changing the colors of your overlay. You can do this with each source, or if you need to, put them all in bulk–all that creativity and freedom is over to you.
We hope this tutorial has helped you out, and we have a whole collection of easy-to-follow tutorials. So, if there’s a question that you’re burning to know the answer to, make sure to come back and take a look at the article section here or join us in our Discord #help channel and we’ll be glad to assist.
New Posts
Streamers VS Mainstream Media
April 8, 2024
The digital landscape is ever-evolving, and with it, the rise of streaming in…
0 Comments7 Minutes
Premium and Free Twitch Overlays Templates
March 24, 2024
Twitch overlay templates are what we do best. Here is a selection of freebies…
0 Comments7 Minutes
Free Twitch Overlays, Alerts, and Widgets
March 3, 2024
Free twitch overlays, alerts, and stream widgets are something that we’ve been…
0 Comments9 Minutes
1 Comment
Add comment Cancel reply
You must be logged in to post a comment.
This site uses Akismet to reduce spam. Learn how your comment data is processed.







how do you change the scene transition color?